Full-stack guide to your first NFT project: Part 1

Ready for your first NFT project? Let’s get coding.
Overview of NFT projects
As a full-stack blockchain developer you have many responsibilities. In this full stack NFT article we’re going to look at the 4 major components you need to finish in order to create your NFT project from scratch, deploy it on the blockchain and allow end-users to mint your NFT from a website.
The 4 main categories are:
- Generating the NFT images and metadata
- Uploading both images and metadata to IPFS or custom API.
- Writing and deploying the ERC721 Smart Contract.
- Enabling end users to mint NFTs via Metamask or other wallets.
In this Part 1 of the series we are working on the first task: Generating NFT images and metadata.
Generating unique NFT images
This is going to be a series of articles. This is part 1 where we will cover generating NFT images and metadata.
Initially you would get a bunch of separate png images all with same dimensions and all represent one trait or feature of your NFT character. All of them with transparent backgrounds.
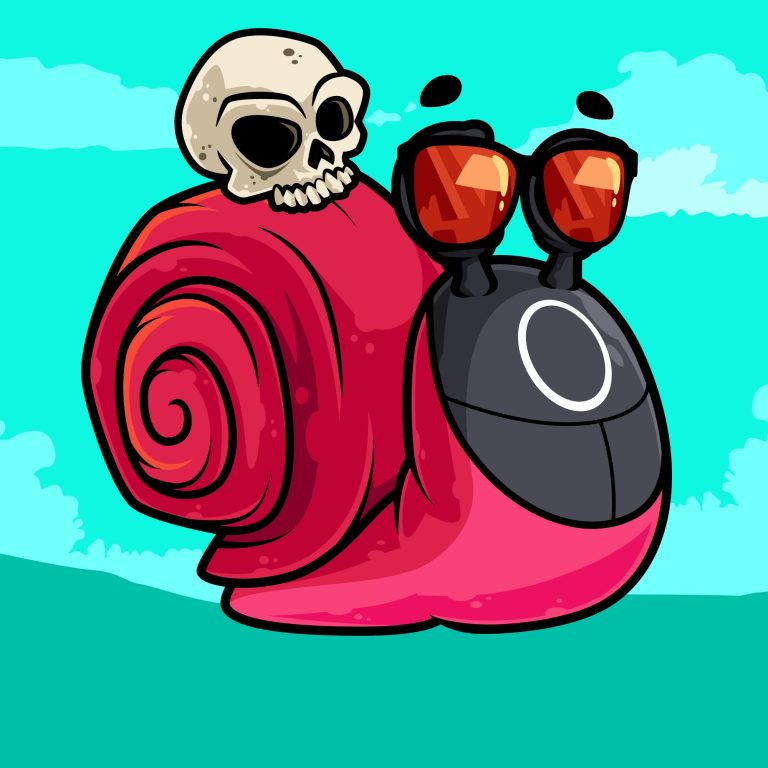
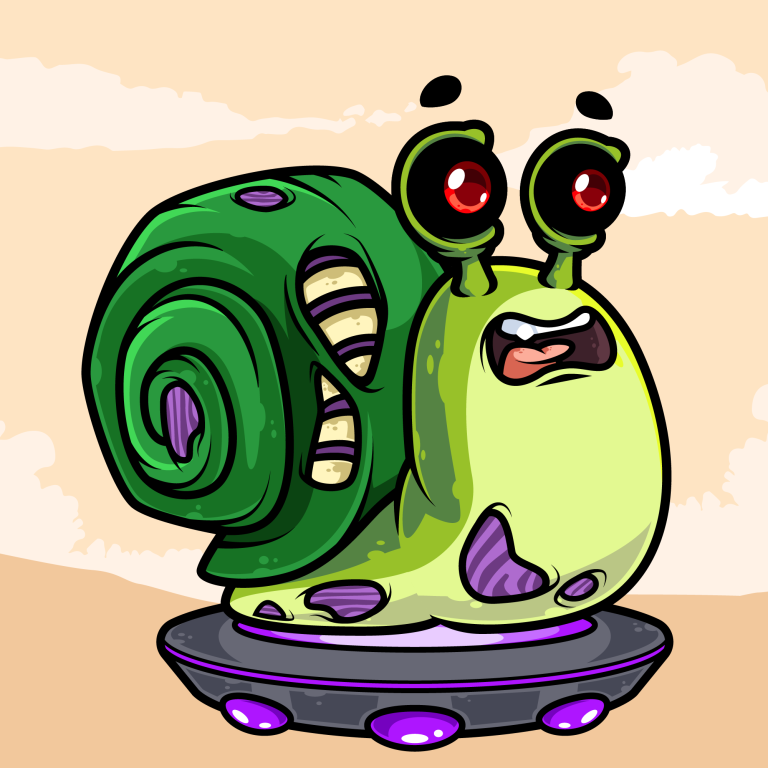
You will have one picture per trait, traits are the attributes of the images. In PFP projects you have combinations of traits that make each NFT from your collection unique. Here are some examples of some snails.

They all look similar by structure but have different skin and have optional traits like glasses, cigars, teeth, hats, etc etc. Let’s learn how to build these.
Directory rarity structure

All NFT traits have different rarities, for example with the snails, you might want the golden teeth to appear in only 1% of all snails, your collection might have 5,000 of these.
However the above rarity structure is from an upcoming collection I’m working on. I’ll include one picture of these upcoming NFTs so you can get a better feel for the way layers are stacked on top of each other.

The traits from the directory structure above correspond to parts of this image.: background, hair, headwear, earrings, clothes etc…
I like to set this up by dividing all traits into five categories, folders numbered 1 through 5 in the directory above.
I then assign probabilities for choosing any of the 5 categories.
For example: WEIGHT_MAP = {1: 0.4, 2: 0.25, 3: 0.2, 4: 0.1, 5: 0.05}
This weight map says, pick category 1 for 40% of the time, category 2 for 25% of the time, cat 3 – 20%, cat 4 – 10% and cat 5 – 5% of the time.
Within category 1 you put the least interesting traits and in category 5 you put the rarest ones. We will use these percentages in our random generator function.
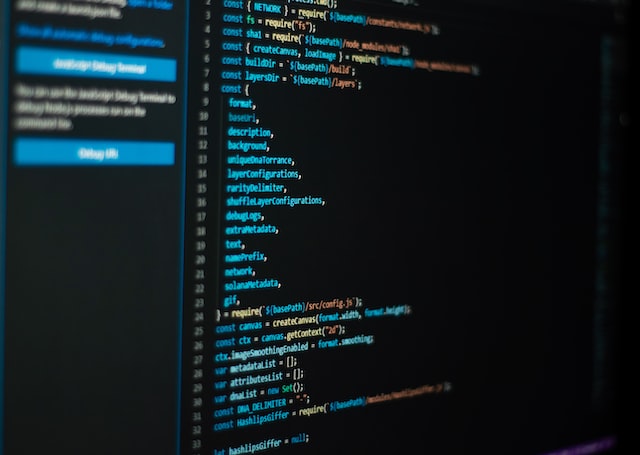
Generate random NFT images with Python
For language we are going to use Python, one of the most widely used and easiest to build with programming languages.
We’ll start by creating a GeneratorController class that will hold all the logic.
class GeneratorController:

    def __init__(self, base_dir, img_dir, meta_dir, weights_map, traits_order):
        self.base_dir = base_dir
        self.img_dir = img_dir
        self.meta_dir = meta_dir
        self.weights_map = weights_map
        self.traits_order = traits_order
The first 3 parameters are simply directories, base_dir
base_dir: directory where all the traits pngs are stored.
img_dir: directory to store the final images.
meta_dir: directory to store the images metadata, more on this later.
weights_map: contains the probabilities or rarities for certain categories
traits_order: contains the list of traits our NFTs will be composed of in the specific order they need to be stacked in the final picture. From our directly example above, the traits are background, backhair, clothes, etc.
percent_appearance: this is an optional advanced feature that allows us to specify percentage of appearance of certain traits. This way we can say, we want only 50% of NFTs to have earrings and only 10% to have necklaces.
matching_traits: another optional advanced feature that helps us match traits that depend on each other. In our case, once we choose the backhair for the girl, the fronthair, which is a different picture, must match. We’ll see how this works later.
Here is how I am constructing the generator.
ctrl = GeneratorController(
    './data/rarities-daydreaming',
    './data/results-img',
    './data/results-metadata',
    WEIGHT_MAP,
    ['background', 'backhair', 'name', 'earrings', 'clothes', 'necklaces', 'fronthair', 'headwear', 'glasses'],
    matching_traits={'fronthair': 'backhair'},
    percent_appearance={'glasses': 50, 'headwear': 50, 'earrings': 65, 'necklaces': 40})
Ok with that out of the way we can start going through the main code.
def generate_all_images(self, total_count, start=0):
    i = start
    unique_names = set()
    while i < start + total_count:
        attributes = {}
        unique_name = None
        print(f'Generating image {i}')
        result_img = None
        for trait_type in self.traits_order:
            category_id = self.get_random_category()
            trait_val = self.gen_random_trait_by_category(category_id, trait_type)
            trait_img = self.open_img(f'{self.base_dir}/{category_id}/{trait_type}/{trait_val}').convert('RGBA')
Starting from the top, total_count defines how many NFTs we want to generate and start defines the id number at which to start naming the pictures.
Usually the pictures are simply named 1.png, 2.png, 3.png etc.
Then we define unique_names set which will help us keep track of all the combinations we’ve created so far, with this we can prevent duplicates. This can happen because we are picking our trait combinations at random using probabilities. If this happens we will detect it and just disregard that picture.
Our while loop will simply iterate total_count times and generate that many NFTs. For each NFT we will store all their trait values in the metadata dictionary and we’ll store its unique name.
Then we start iterating through our traits in our specific order, we will pick random picture for each trait and stack them on top of each other, but let’s go step by step: category_id = self.get_random_category()
We pick a random category, based on our weights_map, with our function bellow.
def get_random_category(self):
    categories = list(self.weights_map.keys())
    weights = list(self.weights_map.values())
    return random.choices(categories, weights)[0]
As a reminder, self.weights_map looks like this:
WEIGHT_MAP = {1: 0.4, 2: 0.25, 3: 0.2, 4: 0.1, 5: 0.05}
In categories above we have the keys: 1, 2, 3, 4, 5.
In weights we hold the values: 0.4, 0.25, 0.2, 0.1, 0.05.
random.choices function is a built-in Python function that receives two lists, the first one contains the elements to pick from, the second contains weights that determine how often to pick certain element. This allows us to define the different rarities our 5 categories represent.
After we have chosen the rarity category from 1 to 5, we need to pick one trait from that category:
trait_val = self.gen_random_trait_by_category(category_id, trait_type)
def gen_random_trait_by_category(self, category_id, trait_name):
    trait_list = os.listdir(f'{self.base_dir}/{category_id}/{trait_name}')
    random_trait_val = random.choice(trait_list)
    return random_trait_val
First we get the trait list by listing all files from our chosen category, for this given trait type. Then we simply select a random one from those and return it.
Moving forward, we load the chosen trait image from the full path and then apply it to our result image called result_img.
trait_img = self.open_img(f'{self.base_dir}/{category_id}/{trait_type}/{trait_val}').convert('RGBA')
if not result_img:
    result_img = trait_img
else:
    result_img = Image.alpha_composite(result_img, trait_img)
The function Image.alpha_composite applies the second argument on top of the first one and returns the resulting image. Of course if result_img is None then we just assign our trait_img. A small caveat here is that you need to convert your image to RGBA format, if it’s not already in it, because alpha_composite will throw an error otherwise.
At the end our image creation cycle we create a unique name consisting of all trait names merged together. This way we can detect if we have generated an already existing image and ignore it.
if not unique_name:
    unique_name = trait_val
else:
    unique_name += f'-{trait_val}'
attributes[trait_type] = trait_val
We also want to store our attributes because they will be part of our metadata later.
Outside of our for-cycle, we check if our name is unique or we need to discard it.
if unique_name in unique_names:
    continue
else:
    i += 1
    unique_names.add(unique_name)
image_name = f'{i}.png'
result_img.save(f'{self.img_dir}/{image_name}')
self.store_metadata(i, attributes)
Finally, we save the image and the metadata for this image. I usually call my image 1.png and the metadata 1.json so I know they correspond to each other.
Storing metadata
The metadata for NFTs needs to be in specific format, I usually use the standard provided by OpenSea.
So the store_metadata function will look like this.
def store_metadata(self, idx, attributes):
    attrs_list = [{'trait_type': key, 'value': value} for key, value in attributes.items()]
    nft_name = f'Girl #{idx}'
    full_metadata = {
        "description": "Daydreaming on the Blockchain.",
        "external_url": "https://daydreaming.com",
        "image": "{image-ipfs}",
        "name": nft_name,
        'attributes': attrs_list,
    }
    metadata_file = open(f'{self.meta_dir}/{idx}.json', 'w')
    metadata_file.write(json.dumps(full_metadata))
    metadata_file.close()
We stored our attributes in a dictionary, but the metadata standard wants them as a list, so that’s what we do in the first line here.
Afterwards we supply: description, external_url, image link, name and attributes. For the image link I have set image-ipfs as a placeholder string. We need to upload all images to ipfs before we can create this link.
Ok that’s all for Part 1. You can find the full code on my GitHub (direct link), and run this yourself.