Zero Dev
In the previous article we discussed what is Account Abstraction and how cool it is and everything. It can potentially make the end-user’s experience much better, but the architecture is not that simple.
There are Bundlers, Paymasters, and Smart Wallets, so as dApp developers, how do we actually use Account Abstraction.
Today we will explore ZeroDev, a framework for working with “Smart Wallets” powered by Account Abstraction.
It’s actually a very nice business model if the AA thing catches on, so I expect a lot more competitors to appear, but for now ZeroDev seems to be the leading framework.
Creating a Smart Wallet with ZeroDev
Generating the Private Key
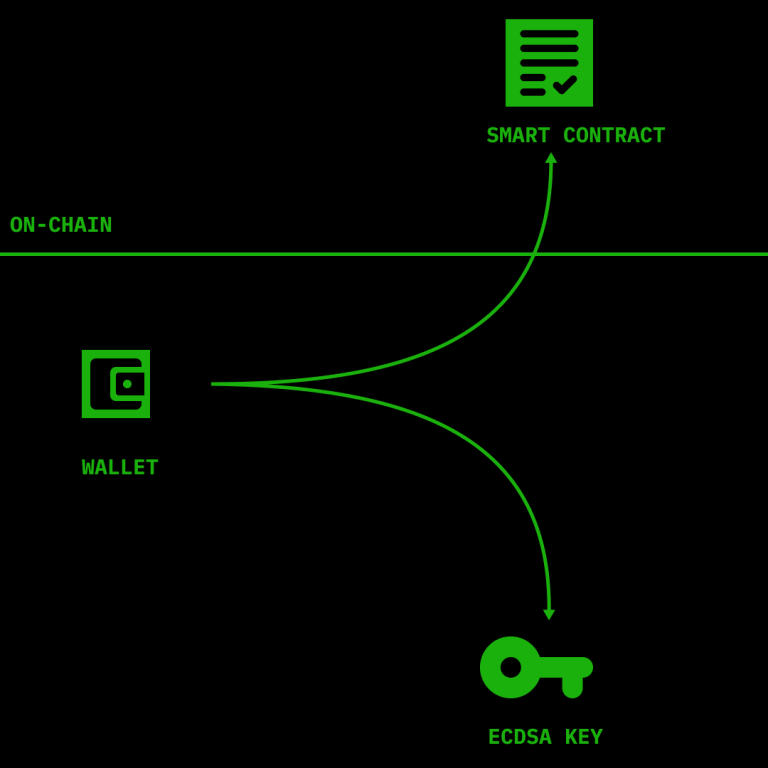
As we discussed, Smart Wallets comprise of a Private Key and a Smart Contract.
For the private key, many existing tools and services can help, and ZeroDev integrates with most of them: Web2 Auth services, Wallets as a Service, Custodial Wallet APIs, and custom keys, check their docs for details.
Deploying the Smart Contract
The second piece of the puzzle is the Smart Contract. We don’t have to worry about this, ZeroDev takes care of deploying the Smart Contract associated with our Smart Wallet.
We just need to initialize the ZeroDev SDK and interact with our wallet as it already exists, it will get created on-demand by the ZeroDev infrastructure.
Real-world example of using Smart Wallets
ZeroDev already has a Github repo with a full React app that creates a wallet, sends gassless transactions and performs batching. Let’s look at the most relevant parts.
In the example, they’re using Rainbowkit, a popular wallet creation library that supports social logins, which is very convenient when coming over from the Web2 world, basically people don’t need Metamask. This must be used in combination with Wagmi which provides React hooks for Ethereum interaction.
Configuring Wagmi and Rainbowkit
So before anything, we need a wrapper with a RainbowKitProvider and Wagmi like below:
import React from "react";
import {
  WagmiConfig,
  configureChains,
  createClient,
} from "wagmi";
import { publicProvider } from 'wagmi/providers/public'
import { polygonMumbai } from 'wagmi/chains'
import { connectorsForWallets, RainbowKitProvider, darkTheme } from '@rainbow-me/rainbowkit'
import {
  googleWallet,
  facebookWallet,
  githubWallet,
  discordWallet,
  twitchWallet,
  twitterWallet,
} from '@zerodevapp/wagmi/rainbowkit'

const defaultProjectId = process.env.REACT_APP_ZERODEV_PROJECT_ID || 'b5486fa4-e3d9-450b-8428-646e757c10f6'

const { chains, provider, webSocketProvider } = configureChains(
  [polygonMumbai],
  [publicProvider()],
)

const connectors = connectorsForWallets([
  {
    groupName: 'Social',
      wallets: [
        googleWallet({options: { projectId: defaultProjectId}}),
        facebookWallet({options: { projectId: defaultProjectId}}),
        githubWallet({options: { projectId: defaultProjectId }}),
        discordWallet({options: { projectId: defaultProjectId }}),
        twitchWallet({options: { projectId: defaultProjectId }}),
        twitterWallet({options: { projectId: defaultProjectId }}),
    ],
  },
]);

const client = createClient({
  autoConnect: false,
  connectors,
  provider,
  webSocketProvider,
})

function ZeroDevWrapper({children}: {children: React.ReactNode}) {
  return (
    <WagmiConfig client={client}>
      <RainbowKitProvider theme={darkTheme()} chains={chains} modalSize="compact">
        {children}
      </RainbowKitProvider>
    </WagmiConfig>
  )
}

export default ZeroDevWrapper
Starting from the imports at the top of the code block, we can see that Wagmi takes care of configuring which chains we will connect with and the client for connecting to them via React.
Rainbowkit on the other hand, contains all the social connectors that allow you to create a new wallet via Social login. But notice we are import Rainbowkite from ZeroDevs SDK, this way our wallet will go through ZeroDev when interacting with the blockchain and use Account Abstraction.
Rainbowkit can also be used directly, without ZeroDev, but then we’ll have a regular wallet, without AA.
The Wrapper component itself simply configures WagmiConfig with RainbowKitProvider inside of it. We use it inside index.tsx where it wraps the main <App/> component.
This allows us to use the Rainbowkits components to create a wallet or connect to a wallet anywhere within our app.
Create AA wallet
import { ConnectButton } from '@rainbow-me/rainbowkit';

export function Login() {
  return (
    <div>
        <ConnectButton label={"Start Demo"} />
    </div>
  );
}
The code above is the Login.tsx component from the ZeroDev demo repo but without all the extra styling. As you can see, all we need is the ConnectButton that will allow us to create a new wallet or connect to an existing one.
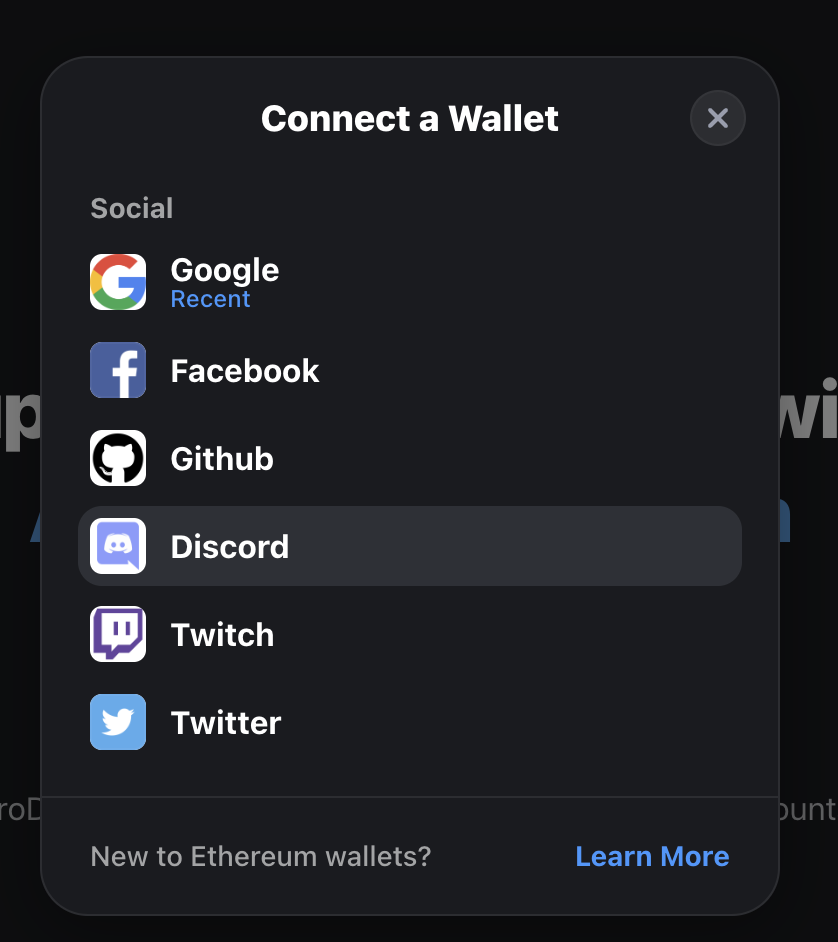
This is the Rainbowkit modal that appears from the ConnectButton. It doesn’t matter if you already have a wallet or not. By logging in with one of your social accounts, if you’ve logged in before, it will reuse your wallet, otherwise it will create a new one for you.
Sponsoring Gas with ZeroDev
Now to some practical example, sponsoring gas. The following is from the SponsoredGasExample component.
import React, { useCallback, useEffect, useRef, useState } from "react";
import {
  useAccount,
  usePrepareContractWrite,
  useContractWrite,
  useContractRead,
  useNetwork
} from "wagmi";
import contractAbi from "../resources/contracts/polygon-mumbai/0x34bE7f35132E97915633BC1fc020364EA5134863.json";
import { Button, Anchor, Flex } from '@mantine/core';
import { Page } from '../Page'

export function SponsoredGasExample({ label = undefined }) {
  const { address } = useAccount();
  const { chain } = useNetwork()

  const [balanceChanging, setBalanceChanging] = useState(false)

  const { config } = usePrepareContractWrite({
    address: "0x34bE7f35132E97915633BC1fc020364EA5134863",
    abi: contractAbi,
    functionName: "mint",
    args: [address],
    enabled: true
  });
  const { write: mint } = useContractWrite(config);

  const { data: balance = 0, refetch } = useContractRead({
    address: "0x34bE7f35132E97915633BC1fc020364EA5134863",
    abi: contractAbi,
    functionName: "balanceOf",
    args: [address],
  });

  useEffect(() => {
    if (balance) {
      setBalanceChanging(false)
    }
  }, [balance])

  const interval = useRef<any>()

  const handleClick = useCallback(() => {
    if (mint) {
      setBalanceChanging(true)
      mint()
      interval.current = setInterval(() => {
        refetch()
      }, 1000)
      setTimeout(() => {
        if (interval.current) {
          clearInterval(interval.current)
        }
      }, 100000)
    }
  }, [mint, refetch])

  useEffect(() => {
    if (interval.current) {
      clearInterval(interval.current)
    }
  }, [balance, interval]);

  return (
    <Page title={"Pay Gas for Users"} description={description}>
        <Button
          loading={balanceChanging}
          size={'lg'}
          onClick={handleClick}
        >
          Gas-free Mint
        </Button>
    </Page>
  );
}
There is nothing in this code that is specific to Account Abstraction or sponsoring Gas. We are simply using the Wagmi hooks usePrepareContractWrite and useContractWrite to preform a simple “mint” call to an NFT smart contract. And then we are checking for the balance with interval every second for 10 seconds max.
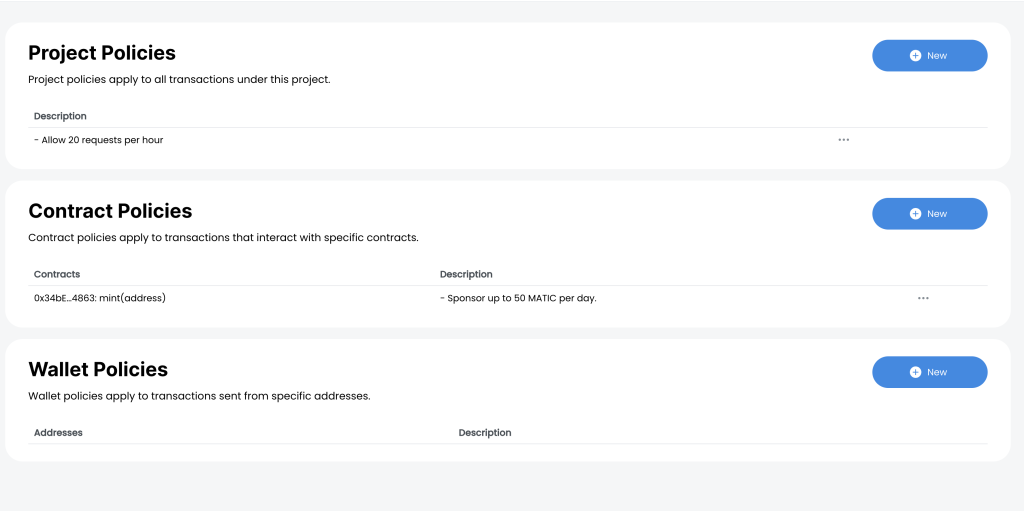
The Gas sponsoring is defined as policies on the ZeroDev’s dashboard. There are 3 types of policies: Project, Contract and Wallet policies.
Project Policies
If you have a dApp that interacts with many contracts, then you can make a Project policy to allow users to try it out without spending gas.
These are the configuration options:
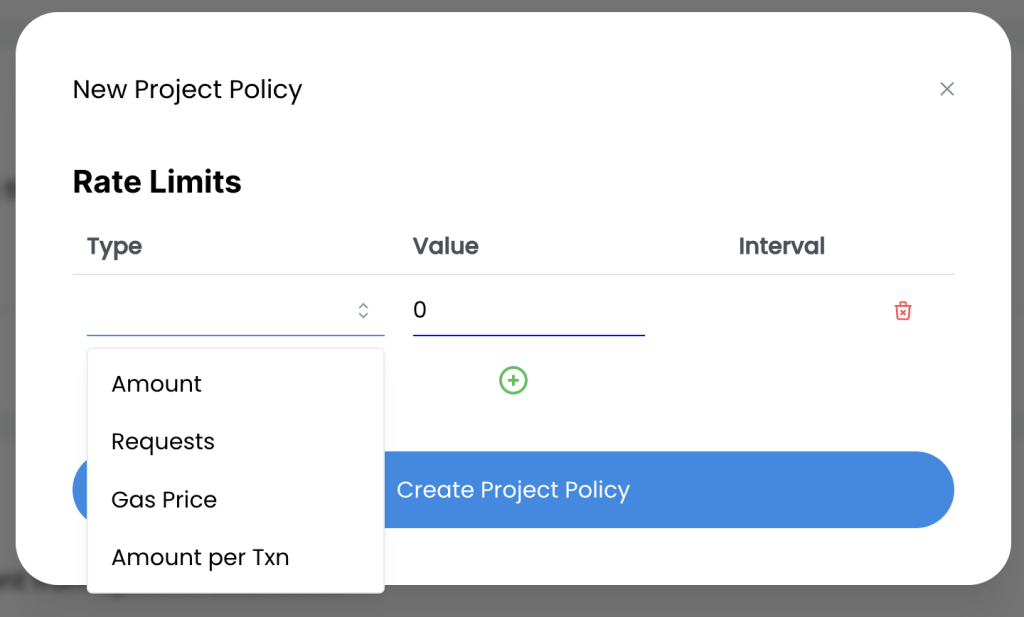
- Amount: Sponsor transactions up to a specific amount. Example: sponsor maximum of 10 ETH per day
- Request: Sponsor at most 100 requests per hour.
- Gas Price: Sponsor transactions if Gas Price is bellow 12 GWEI.
- Amount per Txn: Sponsor up to 2000 GWEI per transaction.
Contract Policies
If you’re working on a protocol or a Smart Contract in general that can be accessed by many clients, then it makes sense to sponsor on the level of a Smart Contract instead of project.
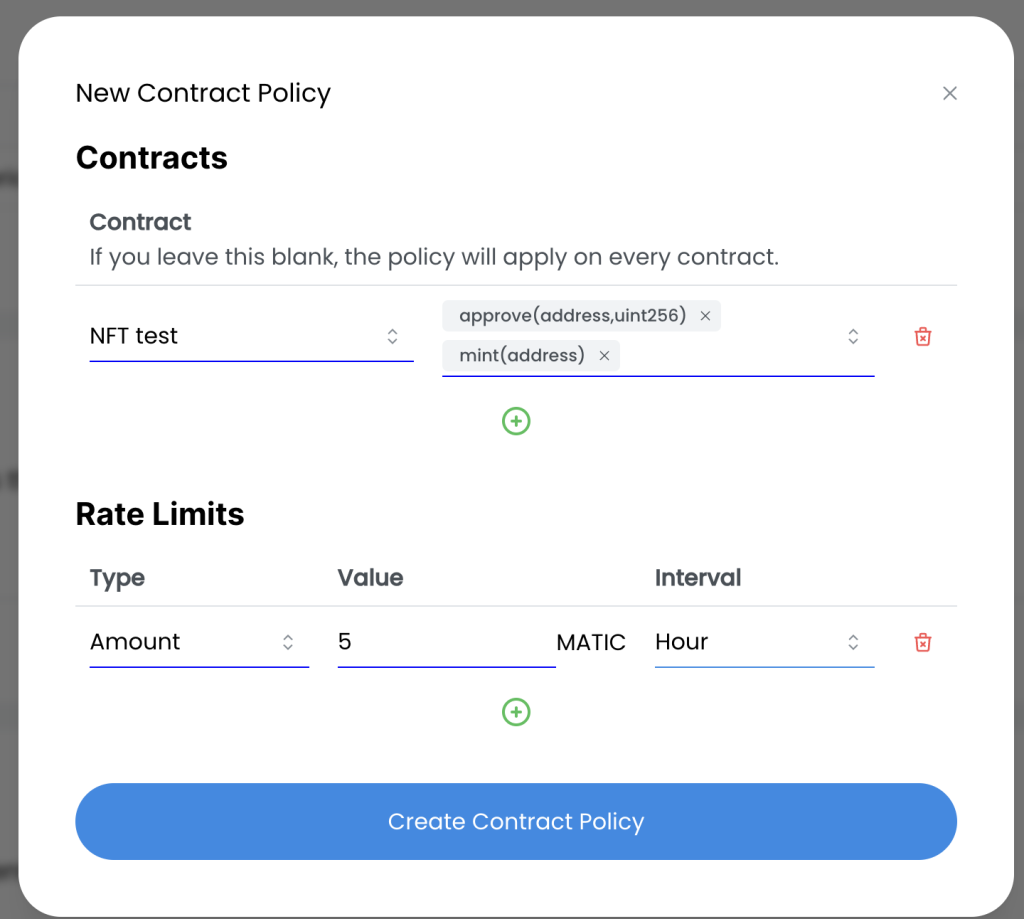
We need to add the contract address and its ABI. And then, we can pick which specific function calls to sponsor and also the Rate Limits just as before.
Wallet Policies
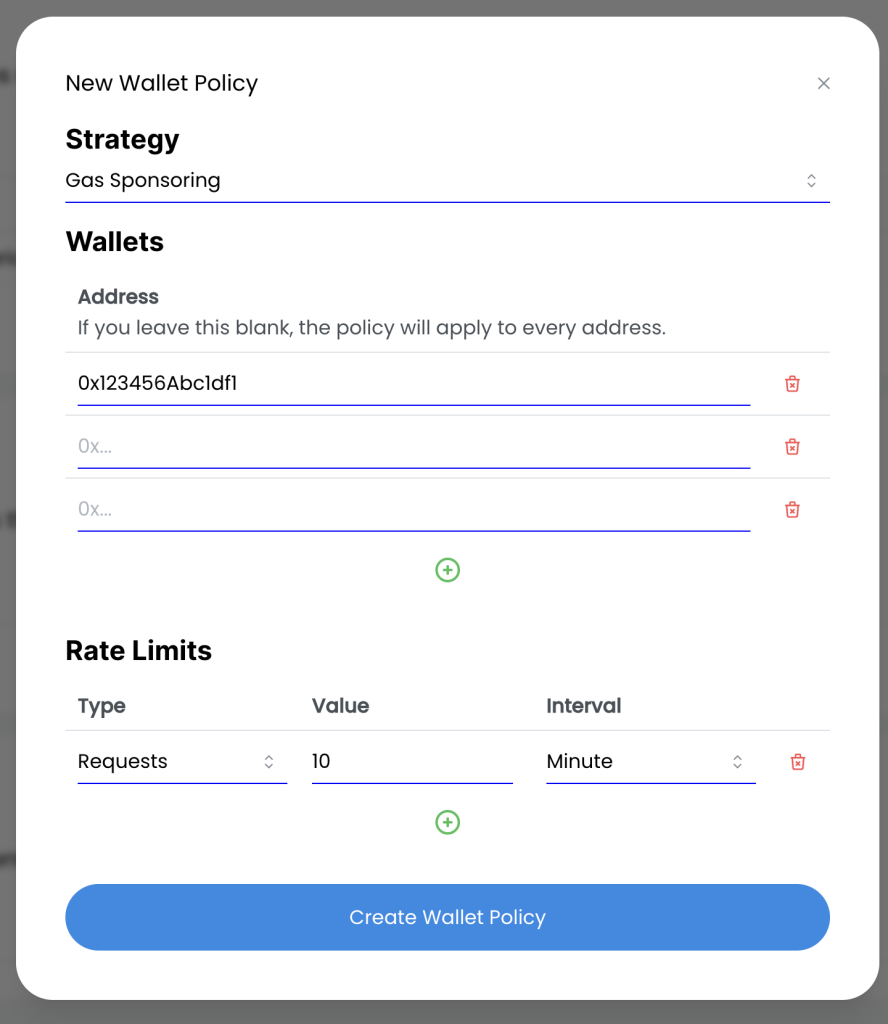
Wallet policies are the most strict, they allow you to limit sponsoring to only specific addresses.
This is useful if you’re trying to test something on production, or with a very small number of beta testers.
Paying Gas in Stablecoins
Another feature of Account Abstraction with Zero Dev. A lot of times users have stablecoins but no ETH and they’re stuck.
To allow users to pay for gas in tokens, we need to modify the connector in the code, there’s nothing to do in the dashboard.
const connectors = connectorsForWallets([
  {
    groupName: 'Social',
      wallets: [
        googleWallet({options: { projectId: defaultProjectId, gasToken: "USDC"}}),
        facebookWallet({options: { projectId: defaultProjectId, gasToken: "USDC"}}),
        githubWallet({options: { projectId: defaultProjectId }}),
        discordWallet({options: { projectId: defaultProjectId }}),
        twitchWallet({options: { projectId: defaultProjectId }}),
        twitterWallet({options: { projectId: defaultProjectId }}),
    ],
  },
]);
The name of the ERC20 token can be added in the options array of the social connectors we imported from @zerodev/wagmi/rainbowkit, like githubWallet, discordWallet etc.
Batching transactions
The second Account Abstraction we’ll look at is batching transactions, or sending multiple transactions at once. Again I’ll pull the relevant file BatchExample.tsx and trim the fat.
import { usePrepareContractBatchWrite, useContractBatchWrite, useWaitForAATransaction } from "@zerodevapp/wagmi";
const nftAddress = '0x34bE7f35132E97915633BC1fc020364EA5134863'

export function BatchExample() {
  const { address } = useAccount();
  const { chain } = useNetwork()

  const [balanceChanging, setBalanceChanging] = useState(false)

  const { config } = usePrepareContractBatchWrite({
      calls: [
        {
          address: nftAddress,
          abi: contractAbi,
          functionName: "mint",
          args: [address],
        }, {
          address: nftAddress,
          abi: contractAbi,
          functionName: "mint",
          args: [address],
        }
    ],
    enabled: true
  },
  )

  const { write: batchMint, data } = useContractBatchWrite(config)

  useWaitForAATransaction({
    wait: data?.wait,
    onSuccess() {
      console.log("Transaction was successful.")
    }
  })

  const { data: balance = 0, refetch } = useContractRead({
    address: nftAddress,
    abi: contractAbi,
    functionName: "balanceOf",
    args: [address],
  });

  const interval = useRef<any>()
  const handleClick = useCallback(() => {
    if (batchMint) {
      setBalanceChanging(true)
      batchMint()
      interval.current = setInterval(() => {
        refetch()
      }, 1000)
      setTimeout(() => {
        if (interval.current) {
          clearInterval(interval.current)
        }
      }, 100000)
    }
  }, [batchMint, refetch])

  useEffect(() => {
    if (interval.current) {
      clearInterval(interval.current)
    }
  }, [balance, interval]);

  useEffect(() => {
    if (balance) setBalanceChanging(false)

  }, [balance])
}
The highlighted lines are the most relevant. But there is nothing magical happening here. We have a ready made react hook usePrepareContractBatchWrite that accepts an array of transaction configurations instead of just one transaction as before.
Afterward, we use useContractBatchWrite instead of useContractWrite.
Finally, we wait for the batch transactions to be complete using useWaitForAATransaction, that uses the returned data from the contract write hook and a callback is available on success.
The rest of the code is the same as with a single transaction, we’re just re-fetching the balanceOf function every second until we get a result or 10 seconds have passed.
